

WooCommerce plugin installation
Integrate your WooCommerce store with OnlinePay using the Verifone Hosted Cart
Overview
The WooCommerce plugin for OnlinePay can be installed in one of two ways:
- Upload the ZIP file via the WordPress UI.
- Manually, by copying the plugin files to the appropriate location inside the WordPress installation.
Prerequisites
Before you can install the Verifone Hosted Cart plugin, you must download the plugin files. Click the link below to download the required plugin ZIP file:
Once you have downloaded the plugin ZIP file, you can install the Verifone Hosted Cart plugin using one of the methods described below.
Install the Verifone Hosted Cart plugin via the Wordpress UI
This installation process was written based on the default WordPress theme. Other themes may place certain menu items in different locations. If you are using a different theme, you may need to adjust the instructions accordingly.
- Log in to the WordPress administration panel (generally located at
yourdomain.com/wp-admin). - Navigate to Plugins, then click Add new plugin.
- On the Add Plugins page, click Upload Plugin.
- Click Choose File and select the Verifone Hosted Cart plugin ZIP file you downloaded earlier.
- Click Install Now.
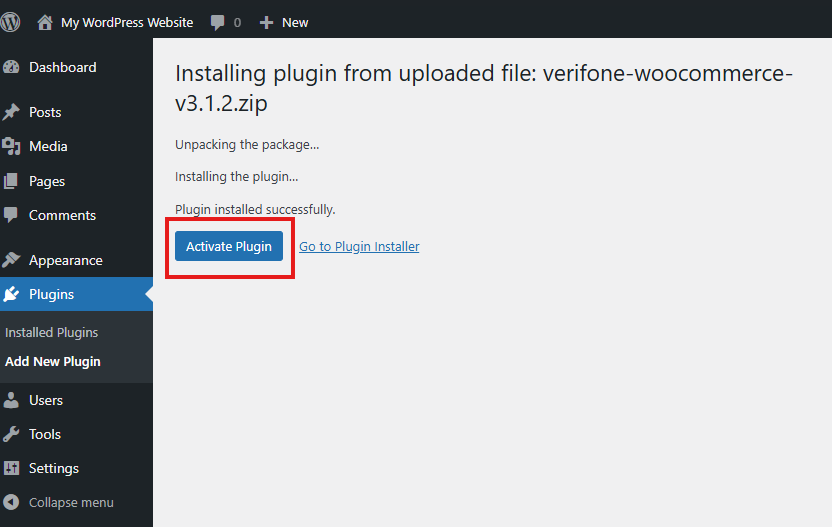
- Once the plugin has been installed, click Activate Plugin.
Install the Verifone Hosted Cart plugin manually
**
You can also install the Verifone Hosted Cart plugin manually by copying the plugin files to the appropriate location inside the WordPress installation.
- Open your WordPress installation directory.
- Navigate to the
wp-content/pluginsdirectory. If you do not have apluginsdirectory, create one. - Extract the Verifone Hosted Cart plugin ZIP file you downloaded earlier.
- Copy the extracted plugin folder to the
wp-content/pluginsdirectory. - Upload the plugin folder to your WordPress installation.