

Pay by Link
Overview
Pay by Link is a feature that allows you to create a payment link and share it with your customers without the need for a website, online store, or having to collect card numbers over the phone.
The link can be shared with your customers using their preferred contact method. When the customer clicks the link, they are redirected to a payment page where they can enter their payment details and complete the transaction.
You can create a payment link using either the OnlinePay dashboard or the API. The link can be customised with the amount to be paid, the customer information, and other details. You can also set an expiry date for the link and track the status of the payment in the Commerce > Payment Tools > Pay by Link page.
By default, payment links created using the OnlinePay dashboard are valid for one day. You can extend the expiry date of the link up to a maximum of 30 days.
Merchants require the Merchant Supervisor role to create and manage Pay by Link payment links.
Create a Pay by Link
You can create a Pay by Link in the OnlinePay dashboard by following these steps:
-
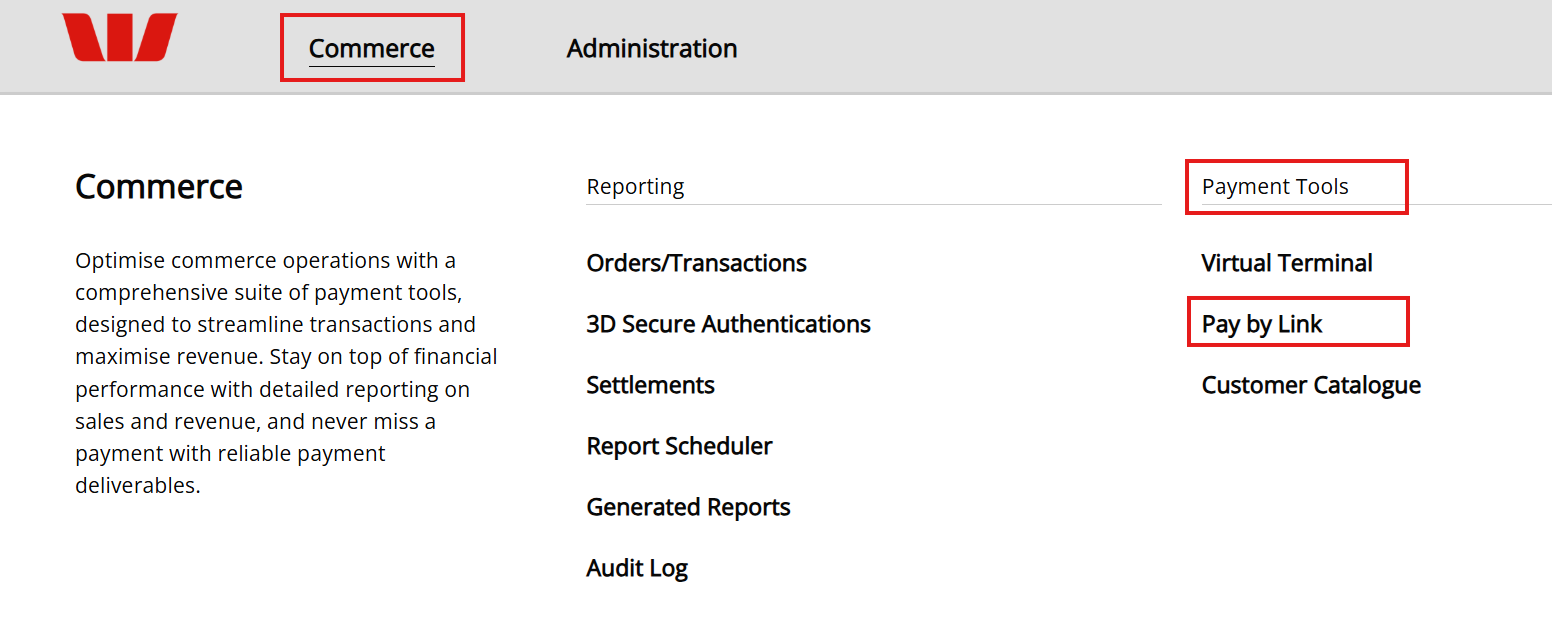
In your OnlinePay dashboard, navigate to Commerce > Payment Tools > Pay by Link. This opens the Pay by Link page.
-
Click Create Payment Link at the top of the page.

-
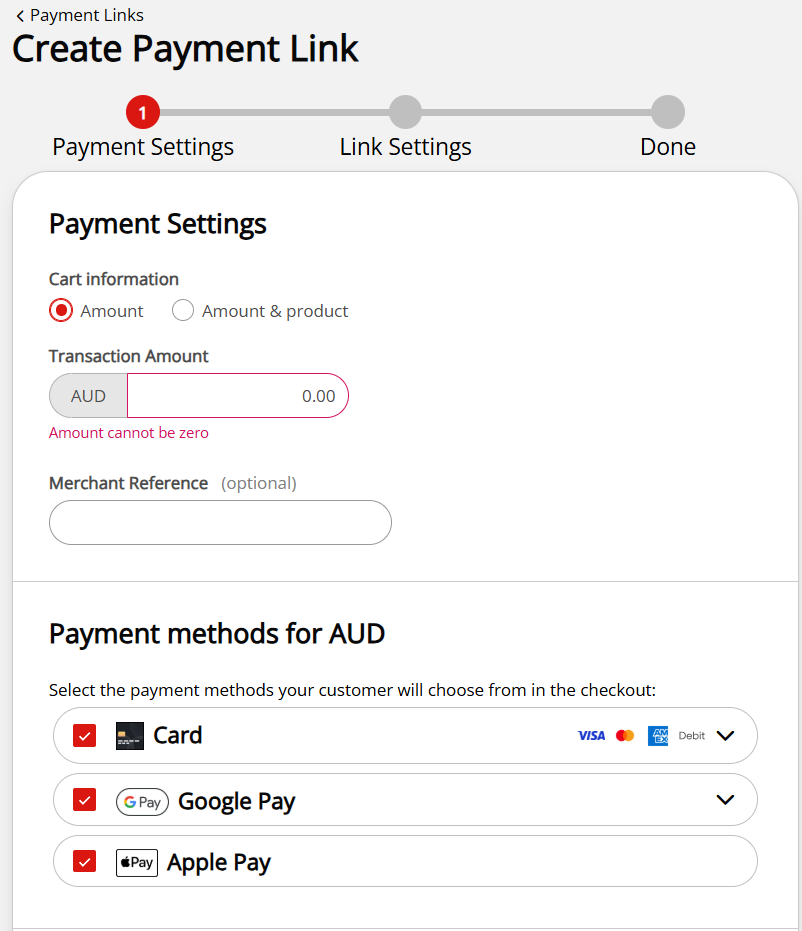
Complete the Payment Settings to configure the payment link amount and organisation details.
Payment Settings
Complete the following information in the Payment Settings section to configure the payment link based on your organisation settings and payment options:
-
If you have more than one Organisation in your OnlinePay dashboard, the Organisation drop-down list will be displayed. Select the Organisation from which you want to issue the payment link from the drop-down list.
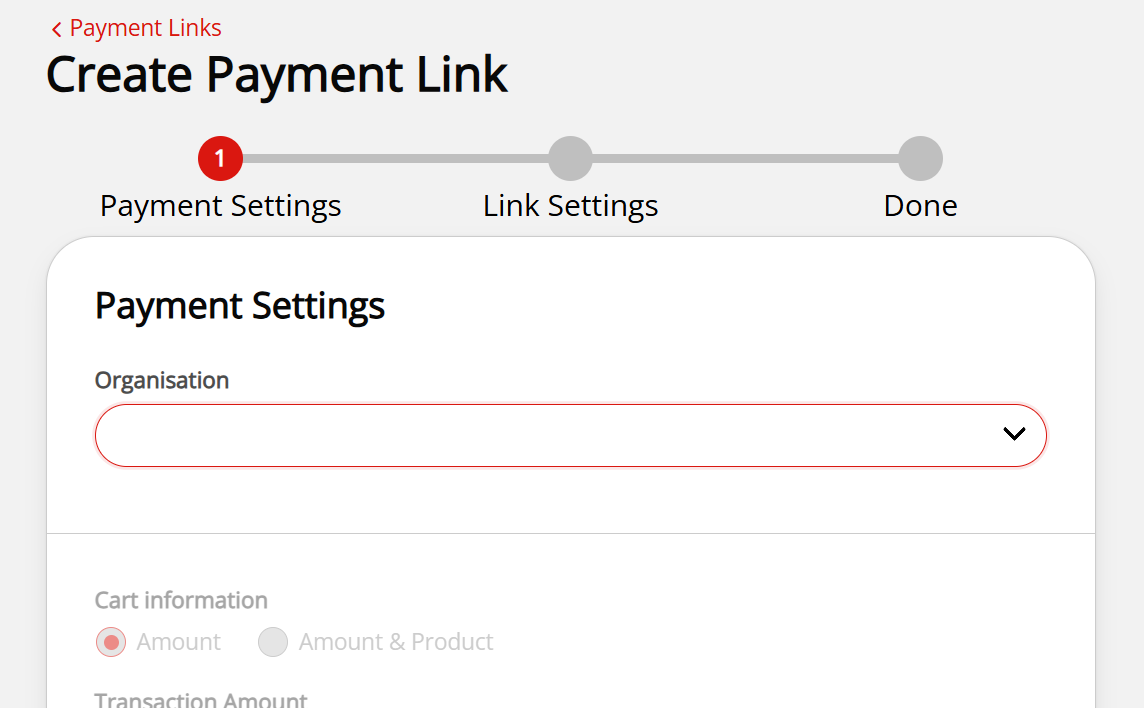
This drop-down list will not appear if you have only one Organisation in your OnlinePay dashboard.
-
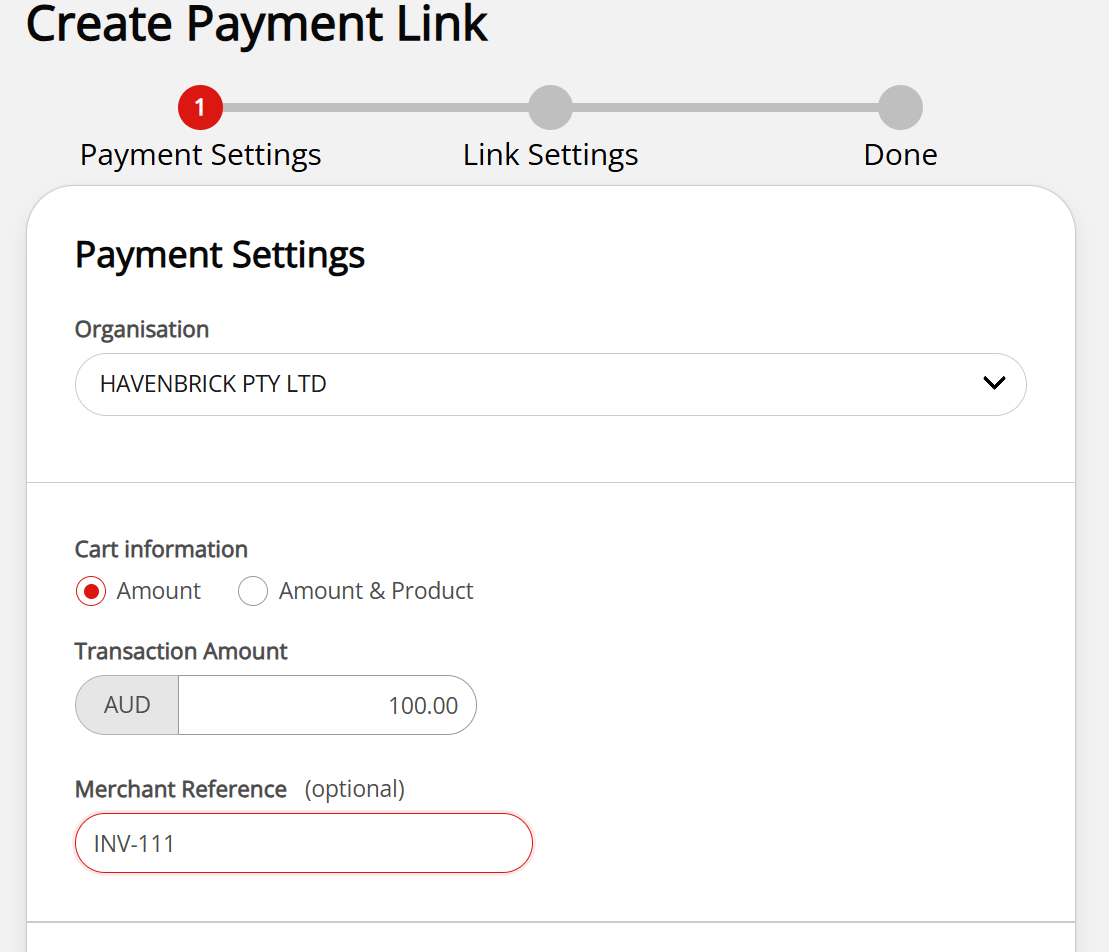
Cart information:
- Choose
Amountto provide a link that includes an amount payable only.
- Alternatively, select
Amount & productto include a product or service description, quantity, price per unit, and product code (optional).
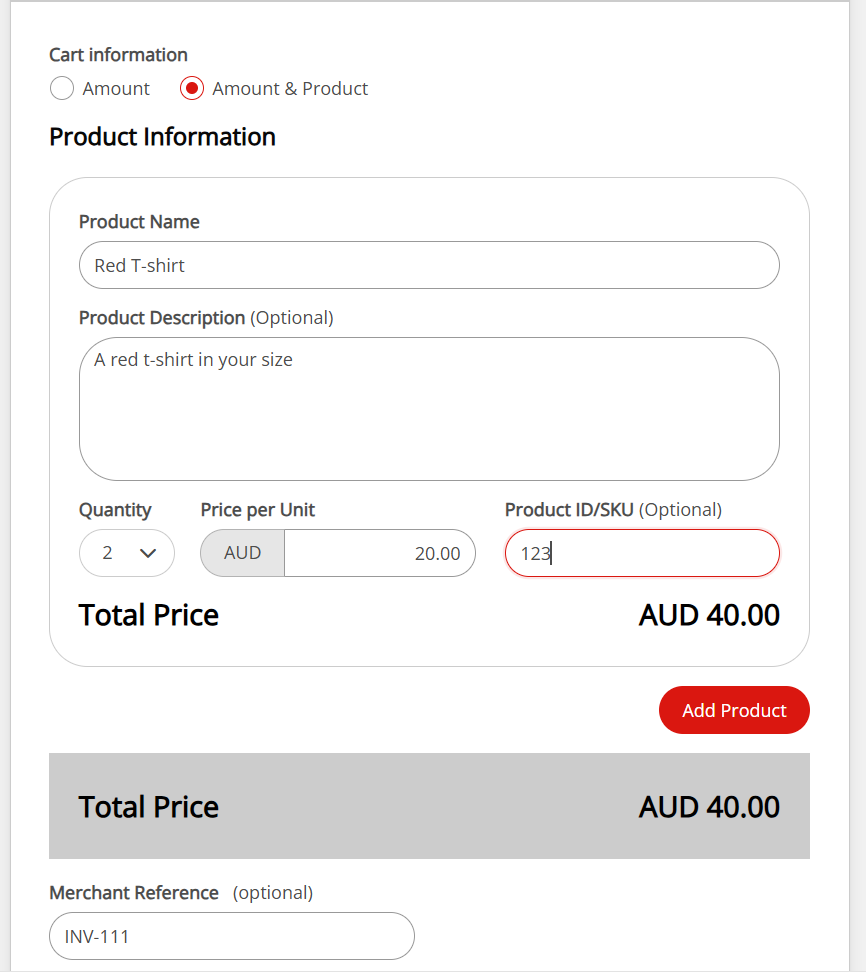
If you select
Amount & product, complete the following fields:- Product Information: Provide the following information:
- Product name: Enter the name of the product or service.
- Product description (optional): Enter a description of the product or service.
- Quantity: Enter the quantity of the product or service.
- Price per unit: Enter the price per unit of the product or service.
- Product ID/SKU (optional): Enter a product code.
Click Add product to add the product to the list. You can add multiple products to the list by repeating this step.
The total amount is calculated automatically based on the quantity and price per unit of the products in the list.
- Choose
-
Merchant Reference (optional): This can be a text or numeric value to help identify the payment and link it to your own order system. You can also use this value to search the link within the Payment Links page.
The Merchant Reference field is limited to 50 characters.
-
Card and wallet payment methods are set to those already configured on your Payment Provider Contract by default. You can choose to disable any method you do not want to include in the payment link.
-
Card: Allows customers to pay using a credit or debit card.
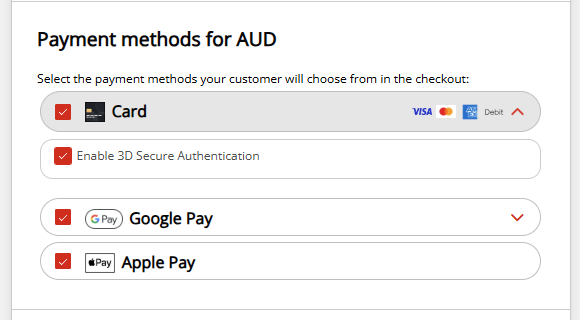
3D Secure authentication is enabled by default. You can disable 3D Secure authentication by unchecking the
Enable 3D Securecheckbox.
Disabling 3D Secure authentication may increase the risk of fraud and chargebacks. -
Google Pay™: Allows customers to pay using Google Pay.
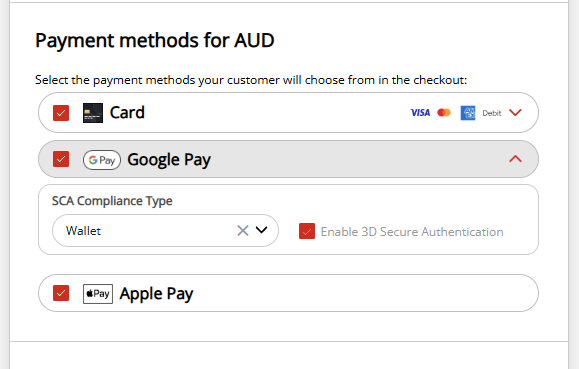
The SCA Compliance type is set to
Walletby default.Wallettransactions enforce 3D Secure on transactions that are not a tokenised card. You can enforce 3D Secure on all transactions via Google Pay by selectingForce SCA.Disabling 3D Secure authentication may increase the risk of fraud and chargebacks.
-
Apple Pay: Allows customers to pay using Apple Pay.
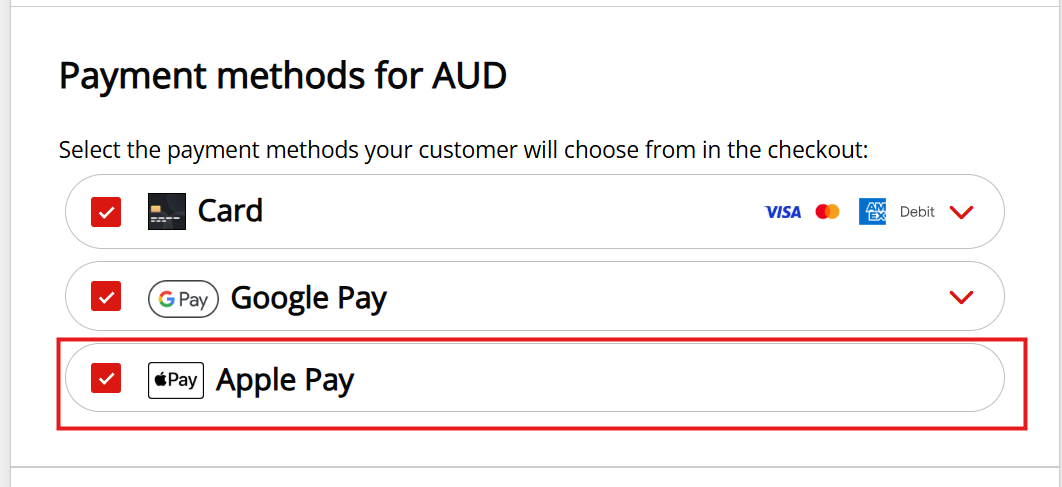
Apple Pay does not require a separate 3D Secure challenge because cardholder authentication is performed by Apple using Face ID, Touch ID, or the device passcode before the payment is authorised.
-
You can enable or disable payment methods by checking or unchecking the corresponding checkboxes. The payment methods you enable will be available to customers when they click the payment link.
Merchants that have more than one Payment Provider Contract for OnlinePay will also see a drop-down Organisations list on the Payment Settings page. The payment options that are available to your customers depend on the payment methods that are enabled for the selected organisation on the Payment Provider Contract.
Select the organisation from the list from which you want to issue the payment link.
Customer details (manual entry)
Provide the customer information required to complete the payment link. Customer details can be added manually, or they can be preselected from the drop-down menu if the customer has previously been added to the Customer Catalogue.
Customer details are mandatory for 3D Secure enabled payment links.
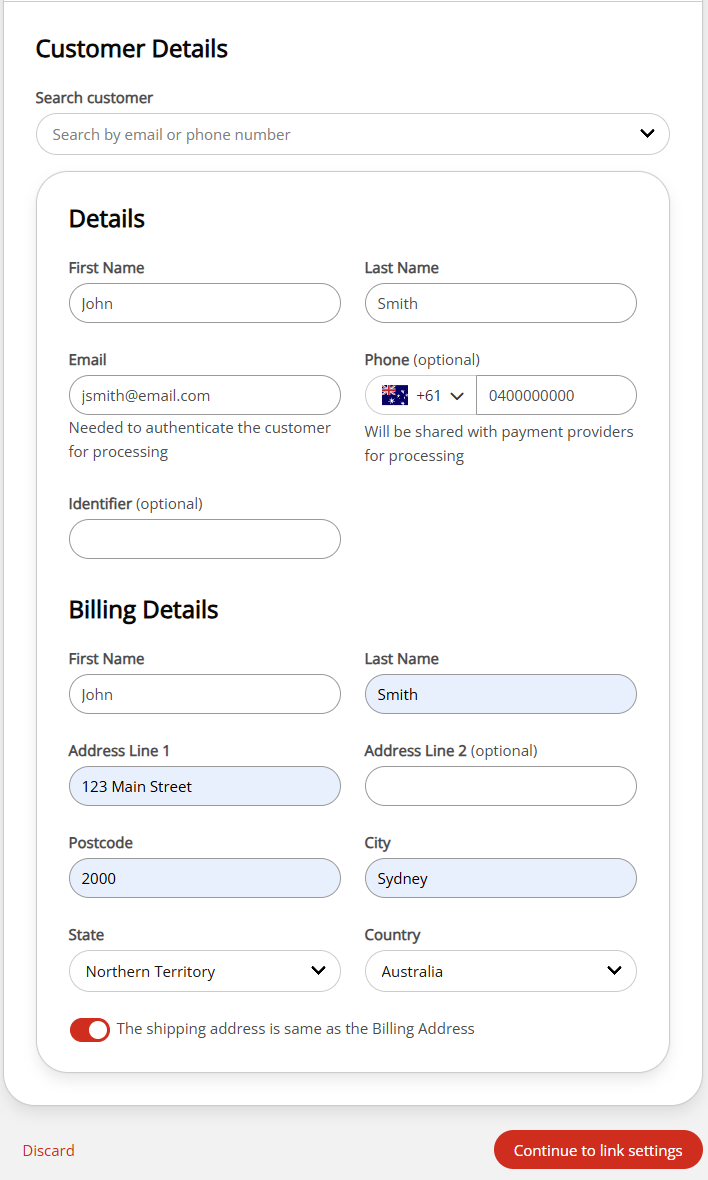
The customer details include the following fields:
- First Name: Enter the customer's first name.
- Last Name: Enter the customer's last name.
- Phone Number: (Optional) Enter the customer's phone number. This is provided to the payment provider for processing.
- Email Address: Enter the customer's email address. This is required to authenticate the customer for processing.
- Identifier: (Optional) Enter a unique identifier for the customer. This is an optional numerical value that can be used to identify the customer in your system. This field requires exactly nine digits.
Billing details
Complete the billing address details for the customer. The billing address details include the following fields:
- Address Line 1: Enter the first line of the customer's address.
- Address Line 2: (Optional) Enter the second line of the customer's address.
- Postcode: Enter the customer's postcode.
- City: Enter the customer's city.
- Country: Select the customer's country from the drop-down list.
- State: Select the customer's state from the drop-down list. This field is required if the customer's country has states.
If the shipping address is different from the billing address, uncheck the The shipping address is the same as the billing address checkbox to provide the shipping address details.
Click Continue to link settings to proceed.
Pre-populate customer details and billing address from the Customer Catalogue
For organisations that have the Customer Catalogue enabled, you can search for an existing customer in the Customer Catalogue and pre-fill the customer details in the form. You can also edit the pre-filled editable fields if required.
-
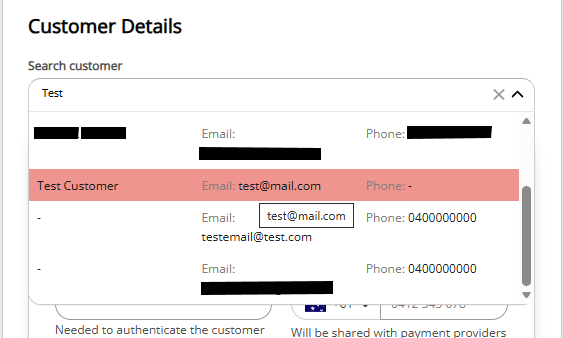
In the Customer Details section, click the Search Customer search field to open the Customer Catalogue and search for the customer by email or phone number.
-
Select the customer from the search results. The customer details will be pre-filled in the form.
If no matches are found in the Customer Catalogue, or there are no customers in the Customer Catalogue for the organisation, the drop down will displayNo customers were found. Please continue by entering the details below.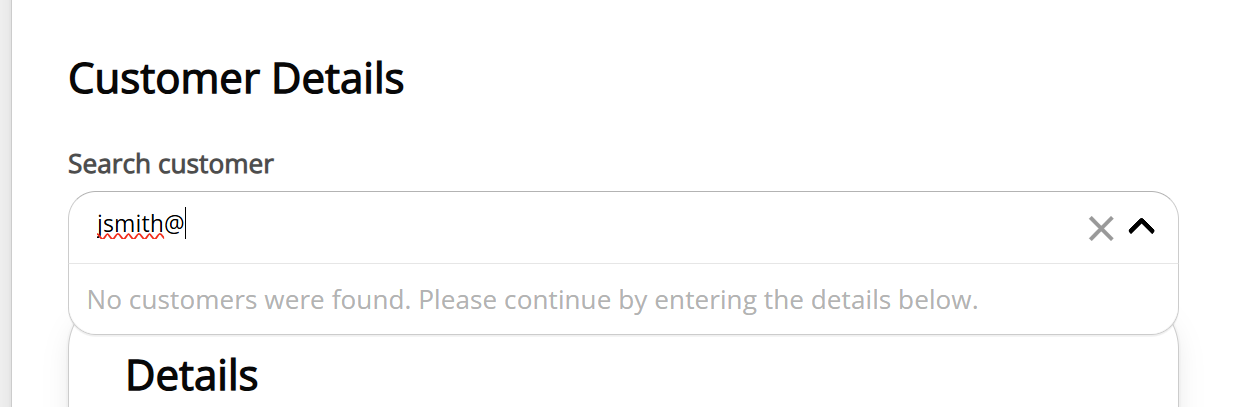
You can then enter the customer details manually as described previously. -
You can edit the pre-filled editable fields if needed, then click Continue to link settings to proceed.
Set link expiry and send payment link
-
In the Link Settings section, complete the following fields as required:
- Link Expiry: Set an expiry date for the payment link, up to a maximum of 30 days.
- Preselected language: Choose the language for the payment page. English is the default language.
- Checkout theme: Select a theme for the payment page from the drop-down list. This field only displays if you have created a Checkout theme. The default theme is applied if no theme is selected, or if you have not created any custom themes.
-
(Optional) Select your preferred delivery method.
You can select SMS, email, or both. If you choose not to select a delivery method from the OnlinePay dashboard, you can still copy the payment link after it has been created and send using another service, or send the link from the next screen.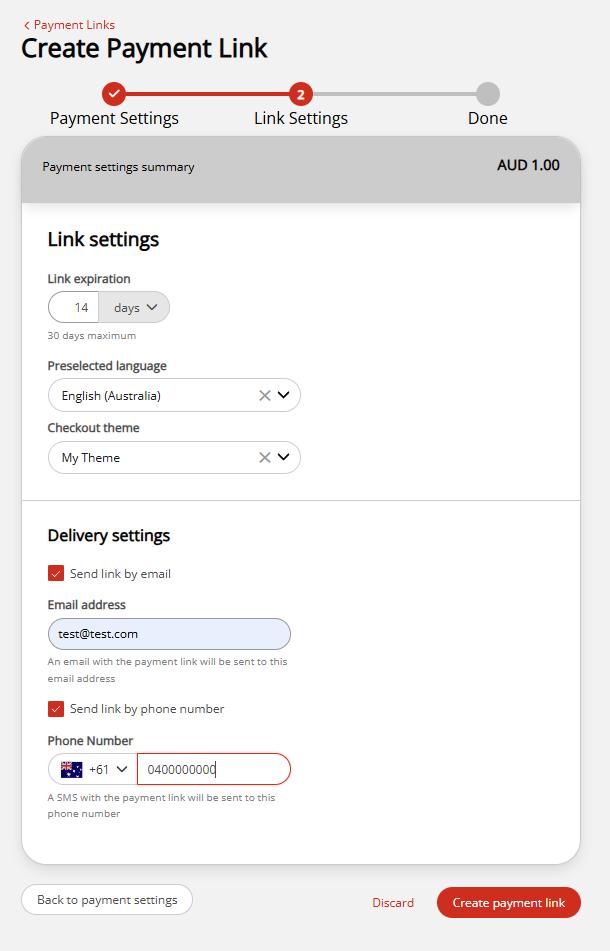
-
Click Create Payment Link to generate the payment link.
Click Send payment link to send the link via email or SMS from this screen. Alternatively, you can click Copy Link to copy the link to your clipboard. You can then share the link with your customers using their preferred contact method, such as email, SMS, or messaging apps.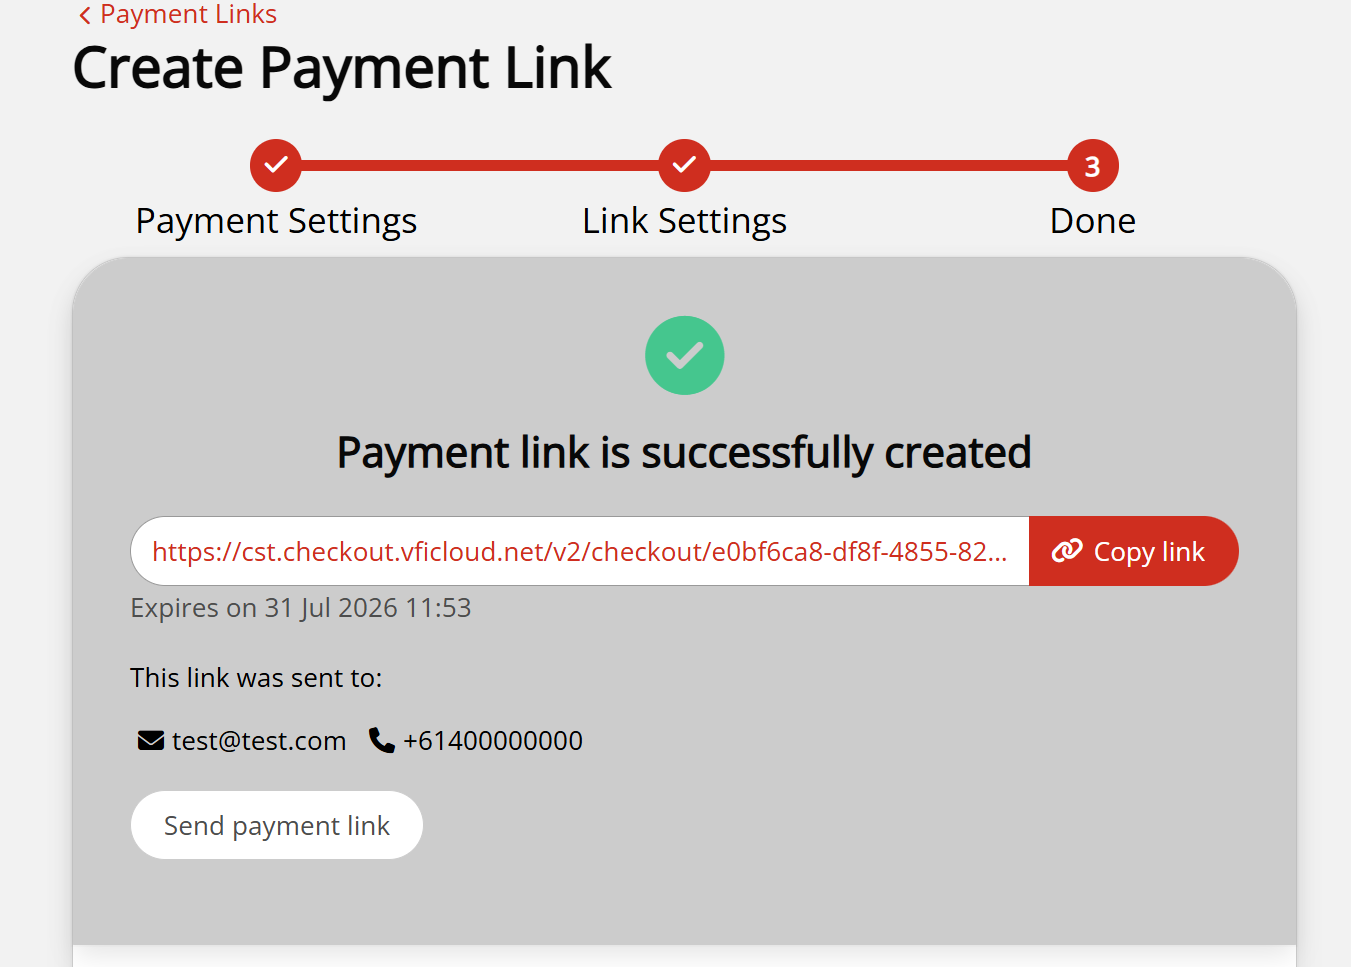
-
Click Return to payment links to return to the Pay by Link page.
Tracking payment status
You can track the status of the payment link in the Pay by Link page. The status of the payment link is updated in real-time as the customer interacts with the link.
Access the Pay by Link page by navigating to Commerce > Pay by Link in your OnlinePay dashboard. The dashboard displays a list of all payment links you have created, along with the following information:
- The date and time the link was created.
- The amount to be paid.
- The email address of the recipient.
- The email address of the customer.
- The Merchant Reference you entered when creating the link. If no reference was entered, this field shows
DefaultMerch. - The status of the payment link, which can be one of the following:
- Paid: The payment has been successfully completed.
- Not paid: The payment has not been completed.
- Expired: The payment has not been processed and the link has expired. The customer can no longer use the link to make a payment until the link is re-enabled or a new link is created.
- Failed: The cardholder has reached the maximum of three failed submission attempts and the link has been disabled. The customer can no longer use the link to make a payment until a new link is created. The link cannot be re-enabled.
Viewing payment details
To view the details of a payment link, the customer details, and perform further actions, click the transaction in the list on the Pay by Link page.
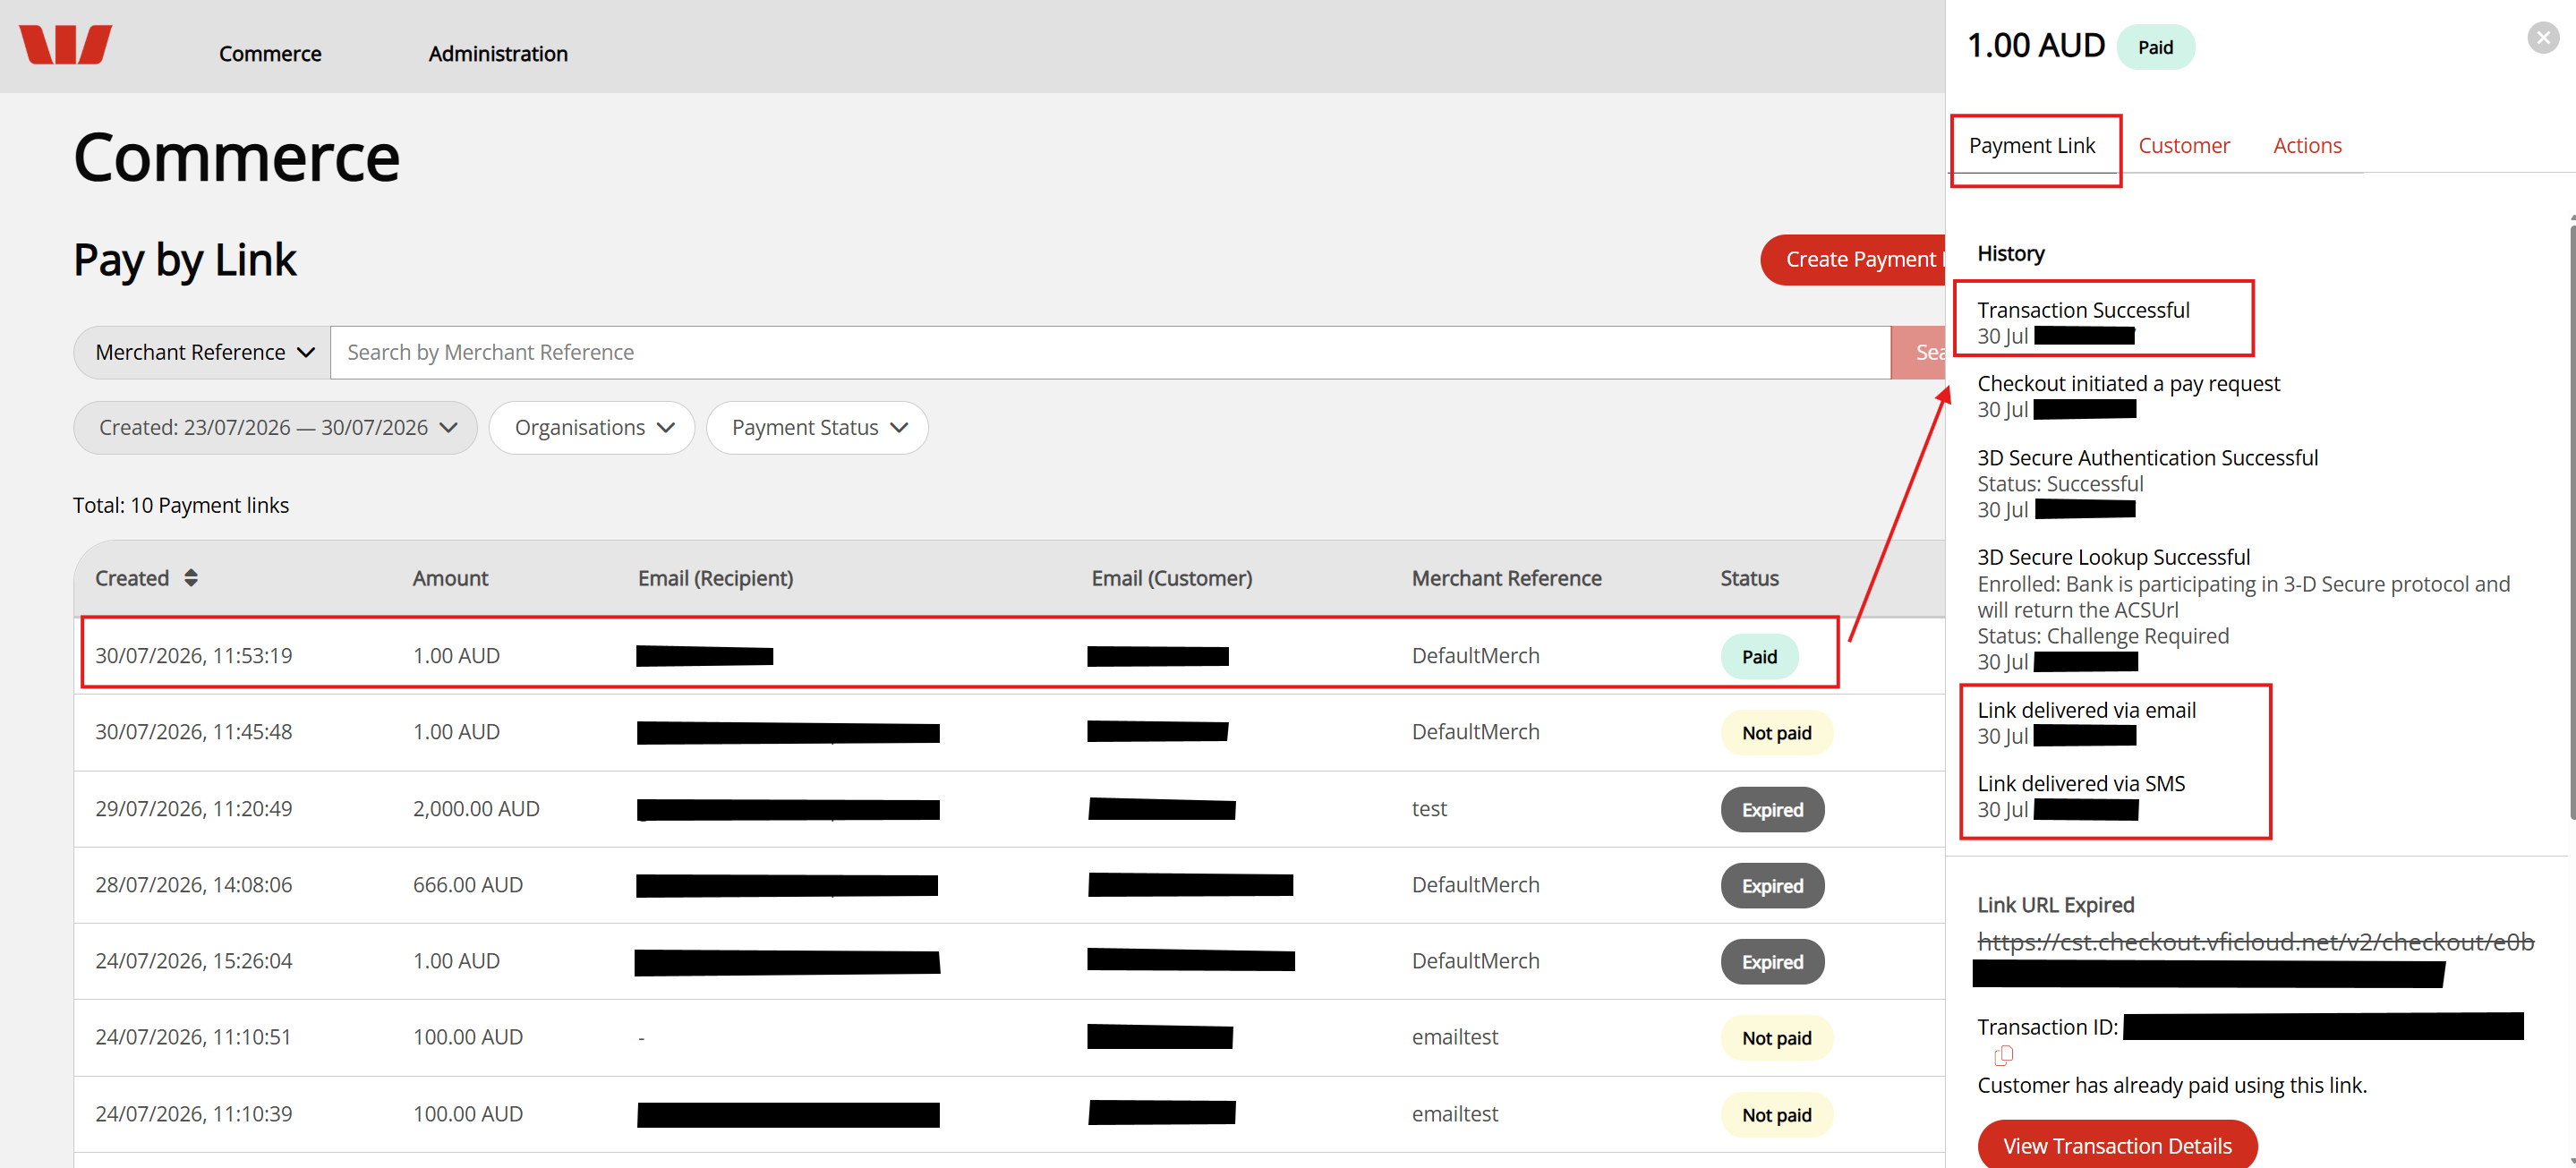
The details panel includes the following tabs:
-
Payment Link: View the history of the payment link, including 3D Secure status, unsuccessful payment attempts, and transaction ID. You can also re-enable the link if it has expired.
- If the payment link is active and not paid, you can copy the link and view the details of the payment.
- If the payment link is paid, you can view the history of the payment link, including 3D Secure status, unsuccessful payment attempts, and transaction details.
- If the payment link has expired, you can re-enable the link and view the details of the payment.
- If the payment link has failed, you can view the history of the payment link, including 3D Secure status, unsuccessful payment attempts
-
Customer: View the customer details and the billing and shipping addresses.
-
Actions: Refresh the payment link if it has expired, or disable the link that has not been paid.
Cancelling a payment link
If you no longer want to accept payment using a payment link, you can cancel the link. To cancel a payment link, follow these steps:
- In the Pay by Link page, click the transaction you want to cancel.
- Click the Actions tab.
- Under Disable link, click Disable link.
Customer will no longer be able to pay the amount once the link is disabled.
The payment link details panel closes and the payment link in the Pay by Link list refreshes to change the status fromNot paidtoExpired.
Re-enable a payment link
If a payment link has expired, you can re-enable the link to generate a new link with the same details. To re-enable a payment link, follow these steps:
-
In the Pay by Link page, click the link you want to re-enable.
-
Click the Actions tab.
-
Under Enable link, set the Link Expiry time up to a maximum of 30 days.
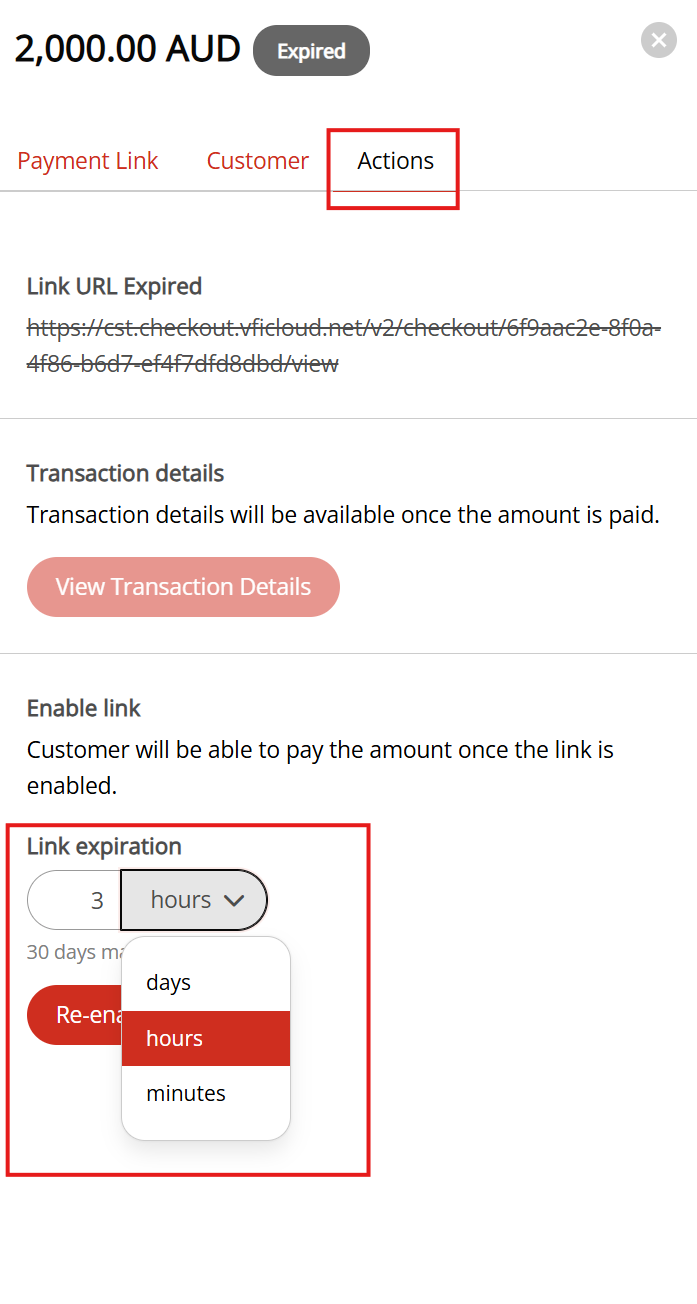
-
Click Re-enable link. The payment link details panel closes and the payment link in the list refreshes to change the status from
ExpiredtoNot paid. -
Open the payment link details again to copy the new link and share it with your customer.
Extend a payment link
To extend a payment link, you must first disable the link. The link can then be re-enabled with a new expiry time up to a maximum of 30 days.
-
Click the payment link that you want to extend from the list on the Pay by Link page in the OnlinePay dashboard.
-
Click the Actions tab.
-
Click Disable link.
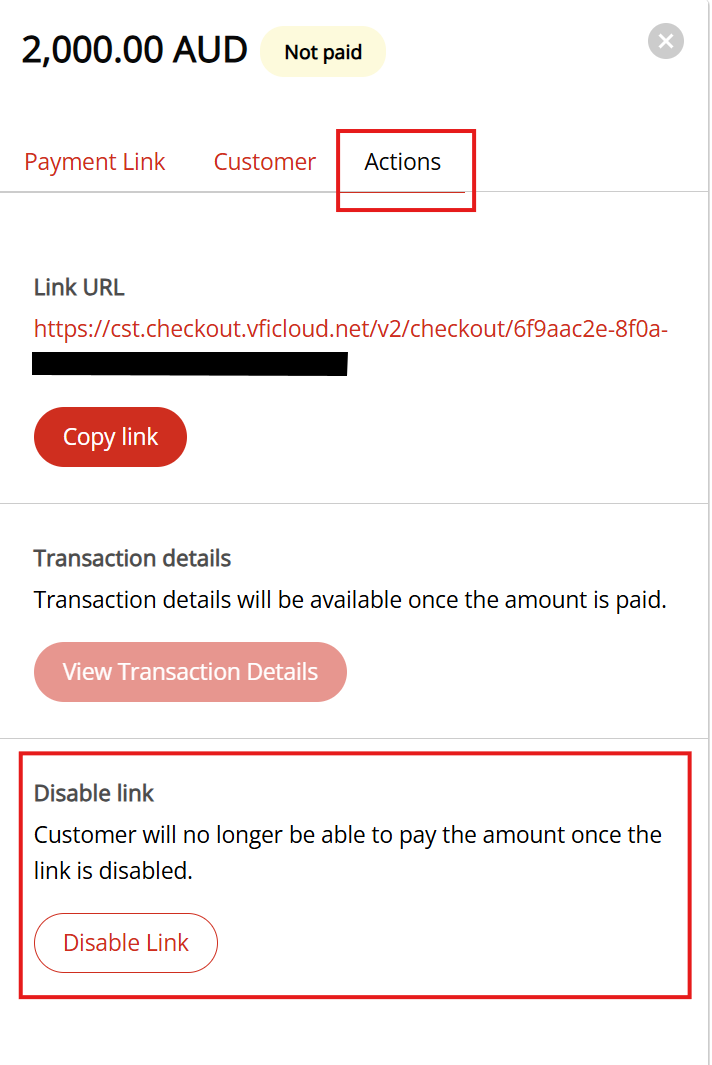
-
Follow the Re-enable a payment link procedure above.
Updated 25 days ago