
User Management & Multi-User Access
Overview
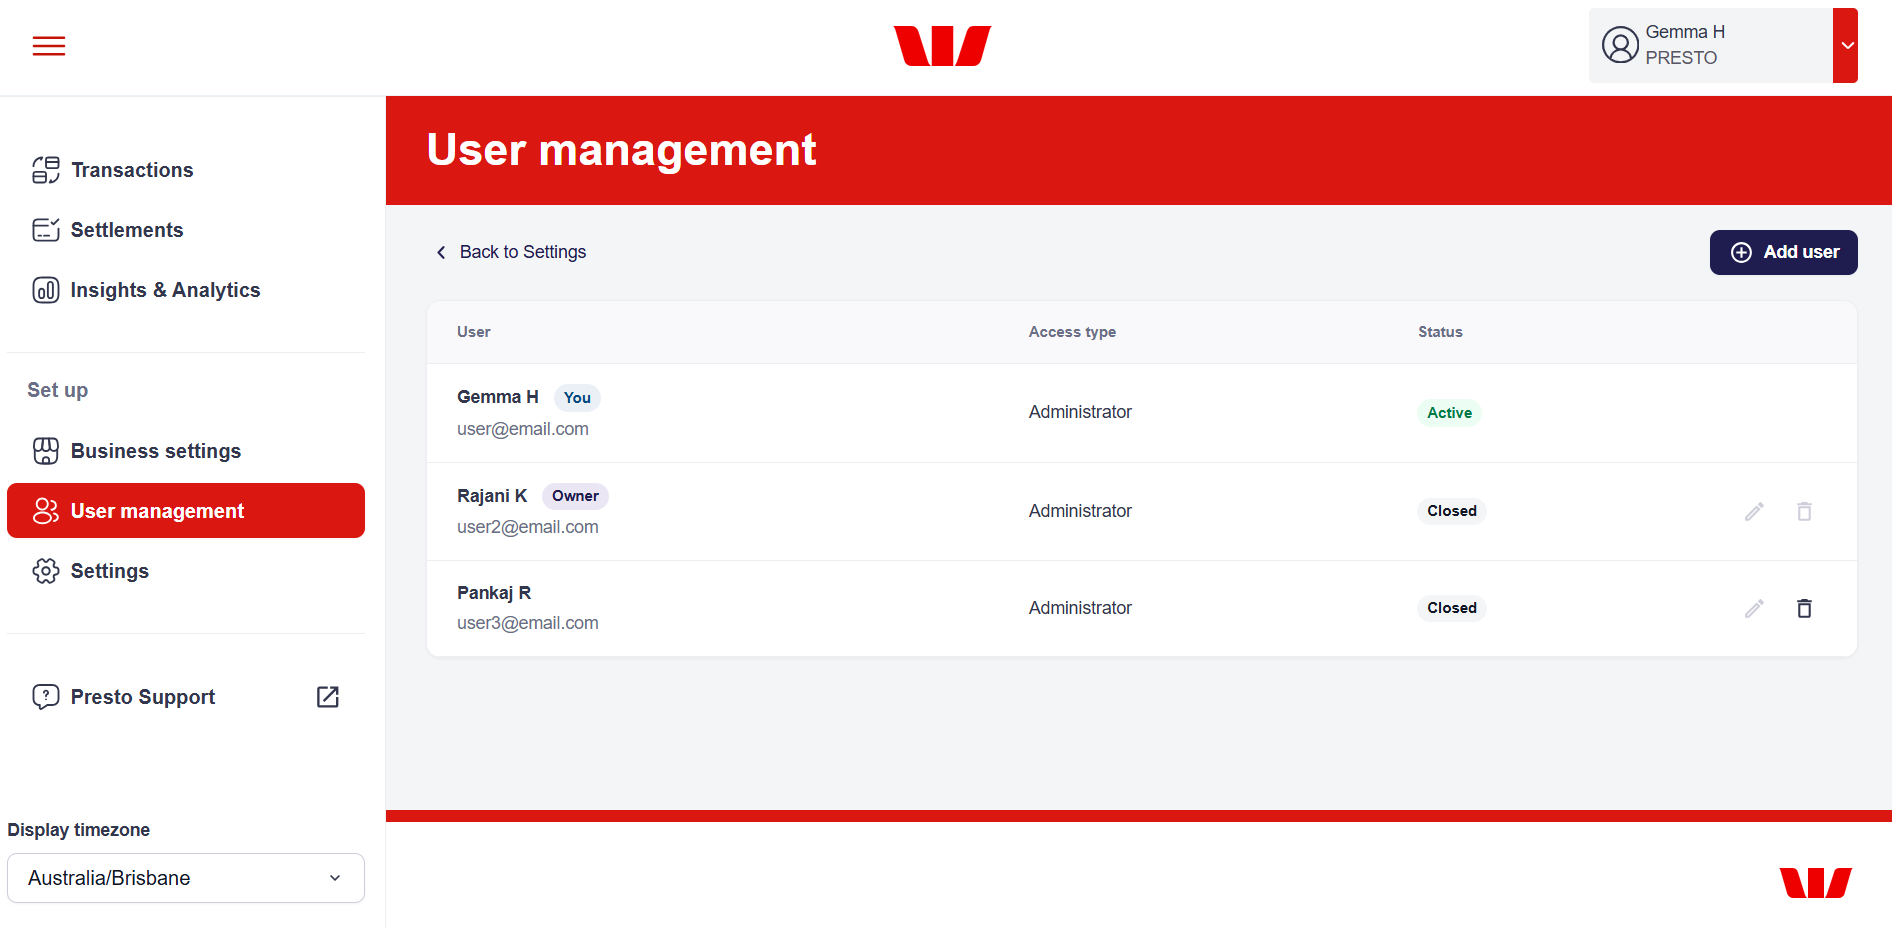
Merchants that have Administrator access to the Presto Dashboard can manage their team through the User Management page. From this page, you can invite new users, assign roles, and manage existing user permissions and access levels.
Users that do not have Administrator access will not see the User Management option in the sidebar and will not have the ability to view or edit user permissions. This ensures that only trusted personnel can manage access to your financial data and dashboard features.
Accessing User Management
To manage your team, open the vertical navigation menu and click on User Management. This will take you to a list of all current users with access to your dashboard, along with their assigned roles and permissions.
Managing Invitations and Existing Users
Administrators have the authority to maintain the user list through the following actions:
- Add user: Add a new user to your Presto facility.
- Resend Invitation: If a user hasn't received their email or the link expired, click Resend next to their name in the user list.
- Update Details: Change a user's role or facility access as their responsibilities evolve.
- Delete User: Instantly revoke a user's access to the dashboard by selecting the delete option.
Adding a New User
To grant a new team member access:
-
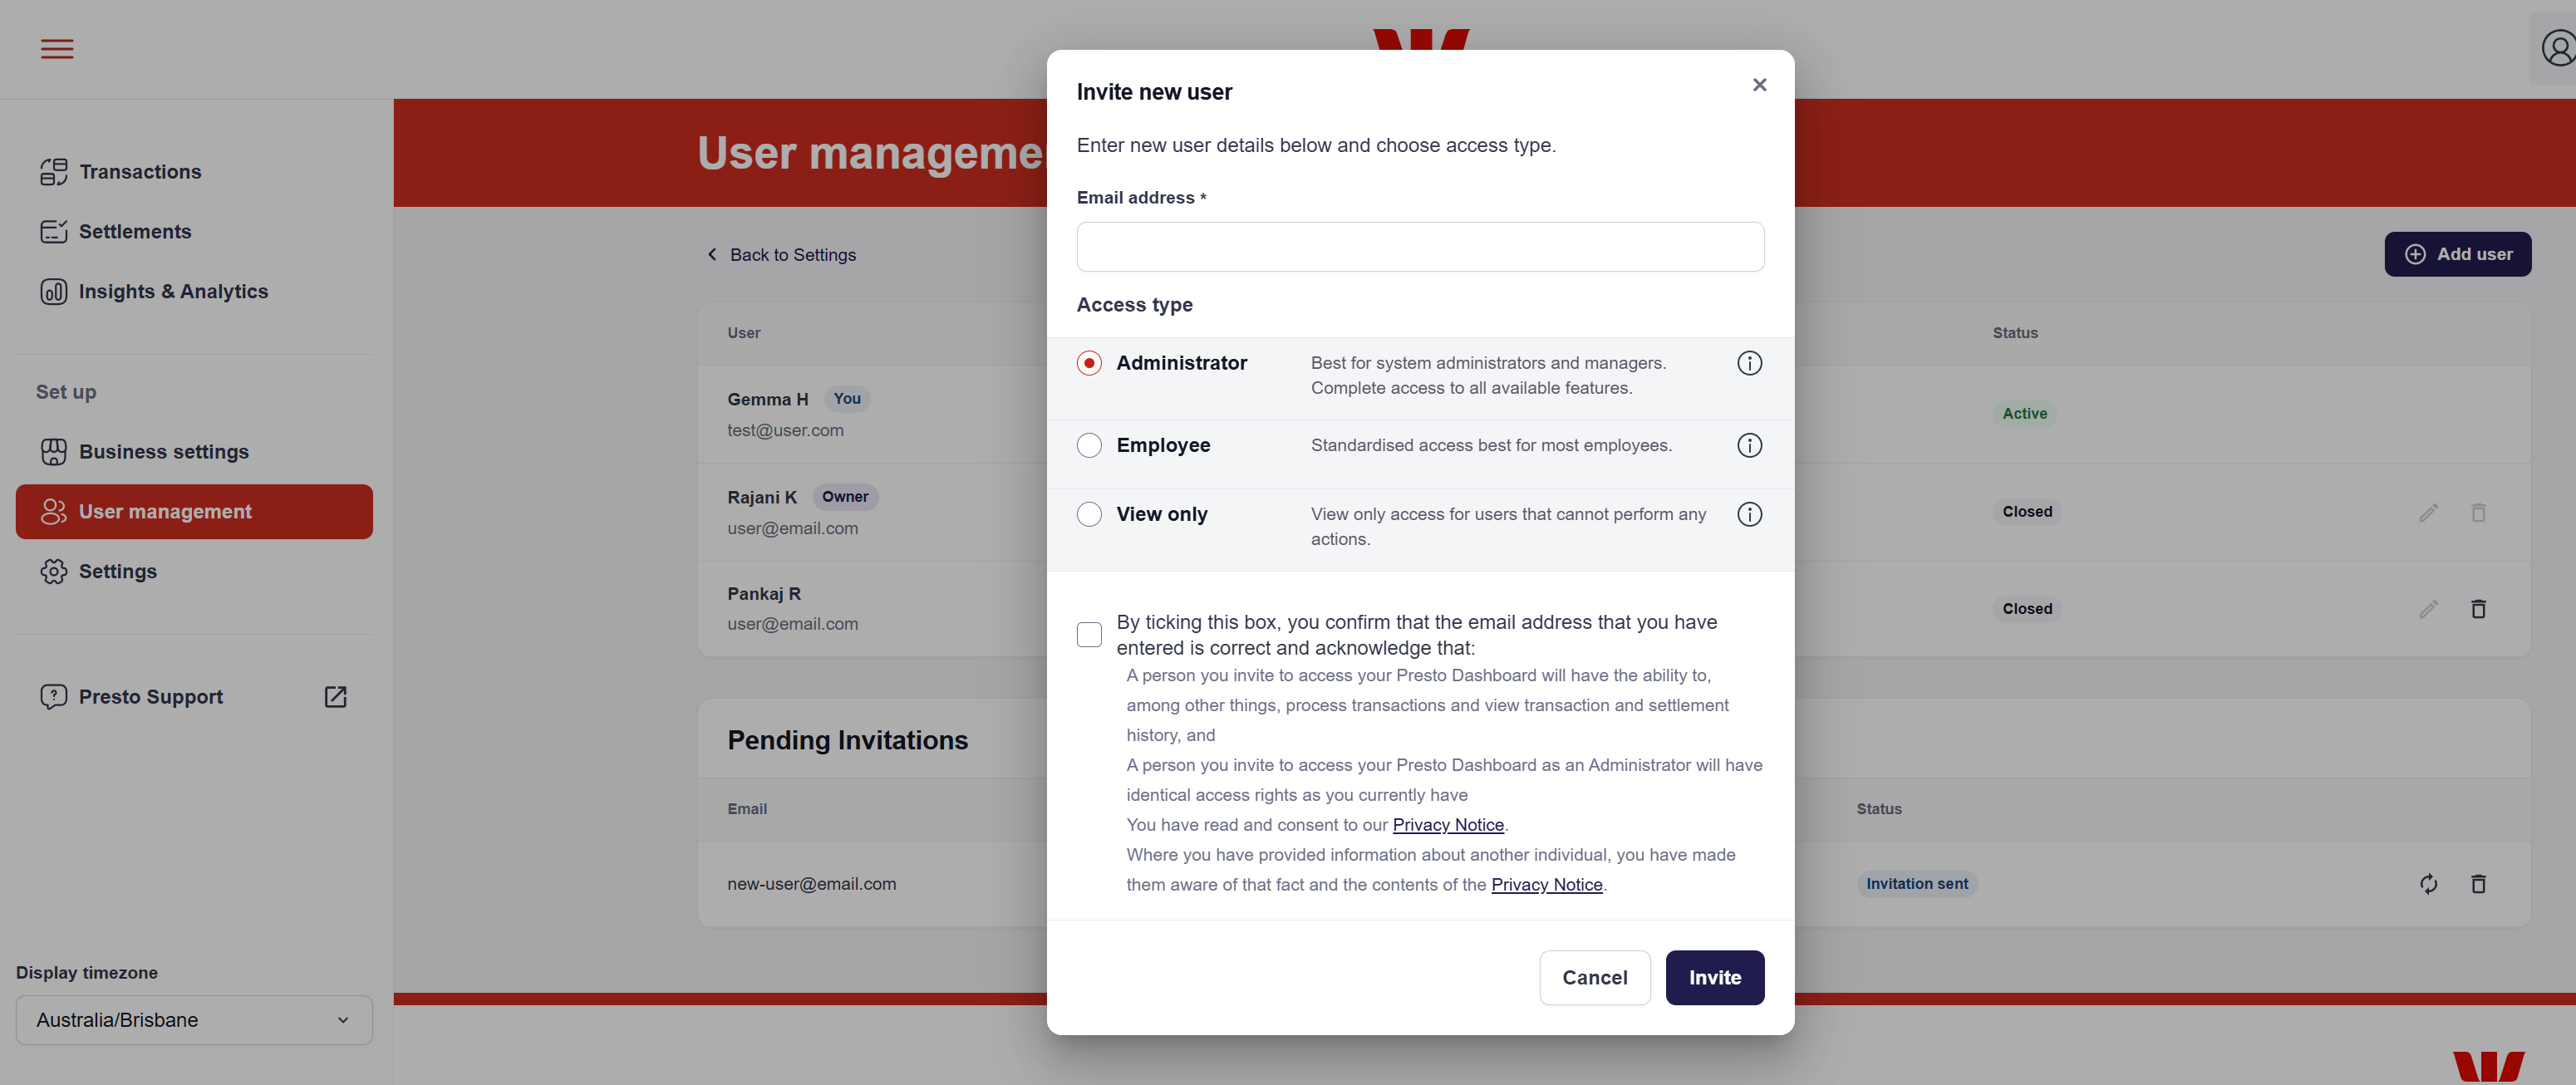
In the User Management page, click the Add user button in the top right corner.
-
Enter the email address of the person you want to invite. You must also tick the box to confirm that the email address is correct and acknowledge that the user will have access to sensitive financial data.
-
Choose the Access type role that best fits their responsibilities. The following roles are available:
-
Administrator: Full access to all features, including user management and business settings. Best suited for system administrators, business owners, or managers.
-
Employee: Limited access to transactions, reports, and settings based on assigned permissions. Ideal for staff members who need to perform specific tasks without full administrative privileges.
-
View Only: Read-only access to transactions and reports without the ability to make changes or perform actions. Suitable for auditors or stakeholders who need to monitor performance without making modifications.
-
-
Click Invite. An email will be sent to the user to set up their credentials.
Resend Invitation
If a user hasn't received their invitation email or the link has expired, you can easily resend it from the Pending Invitations list.
-
Navigate to the User Management page.
-
Scroll down to the Pending Invitations section.
-
Find the user you want to resend the invitation to and click the Resend button
 next to their name.
This will trigger a new email to be sent to the user with instructions to set up their account. A confirmation popup will appear to confirm that the invitation has been resent successfully.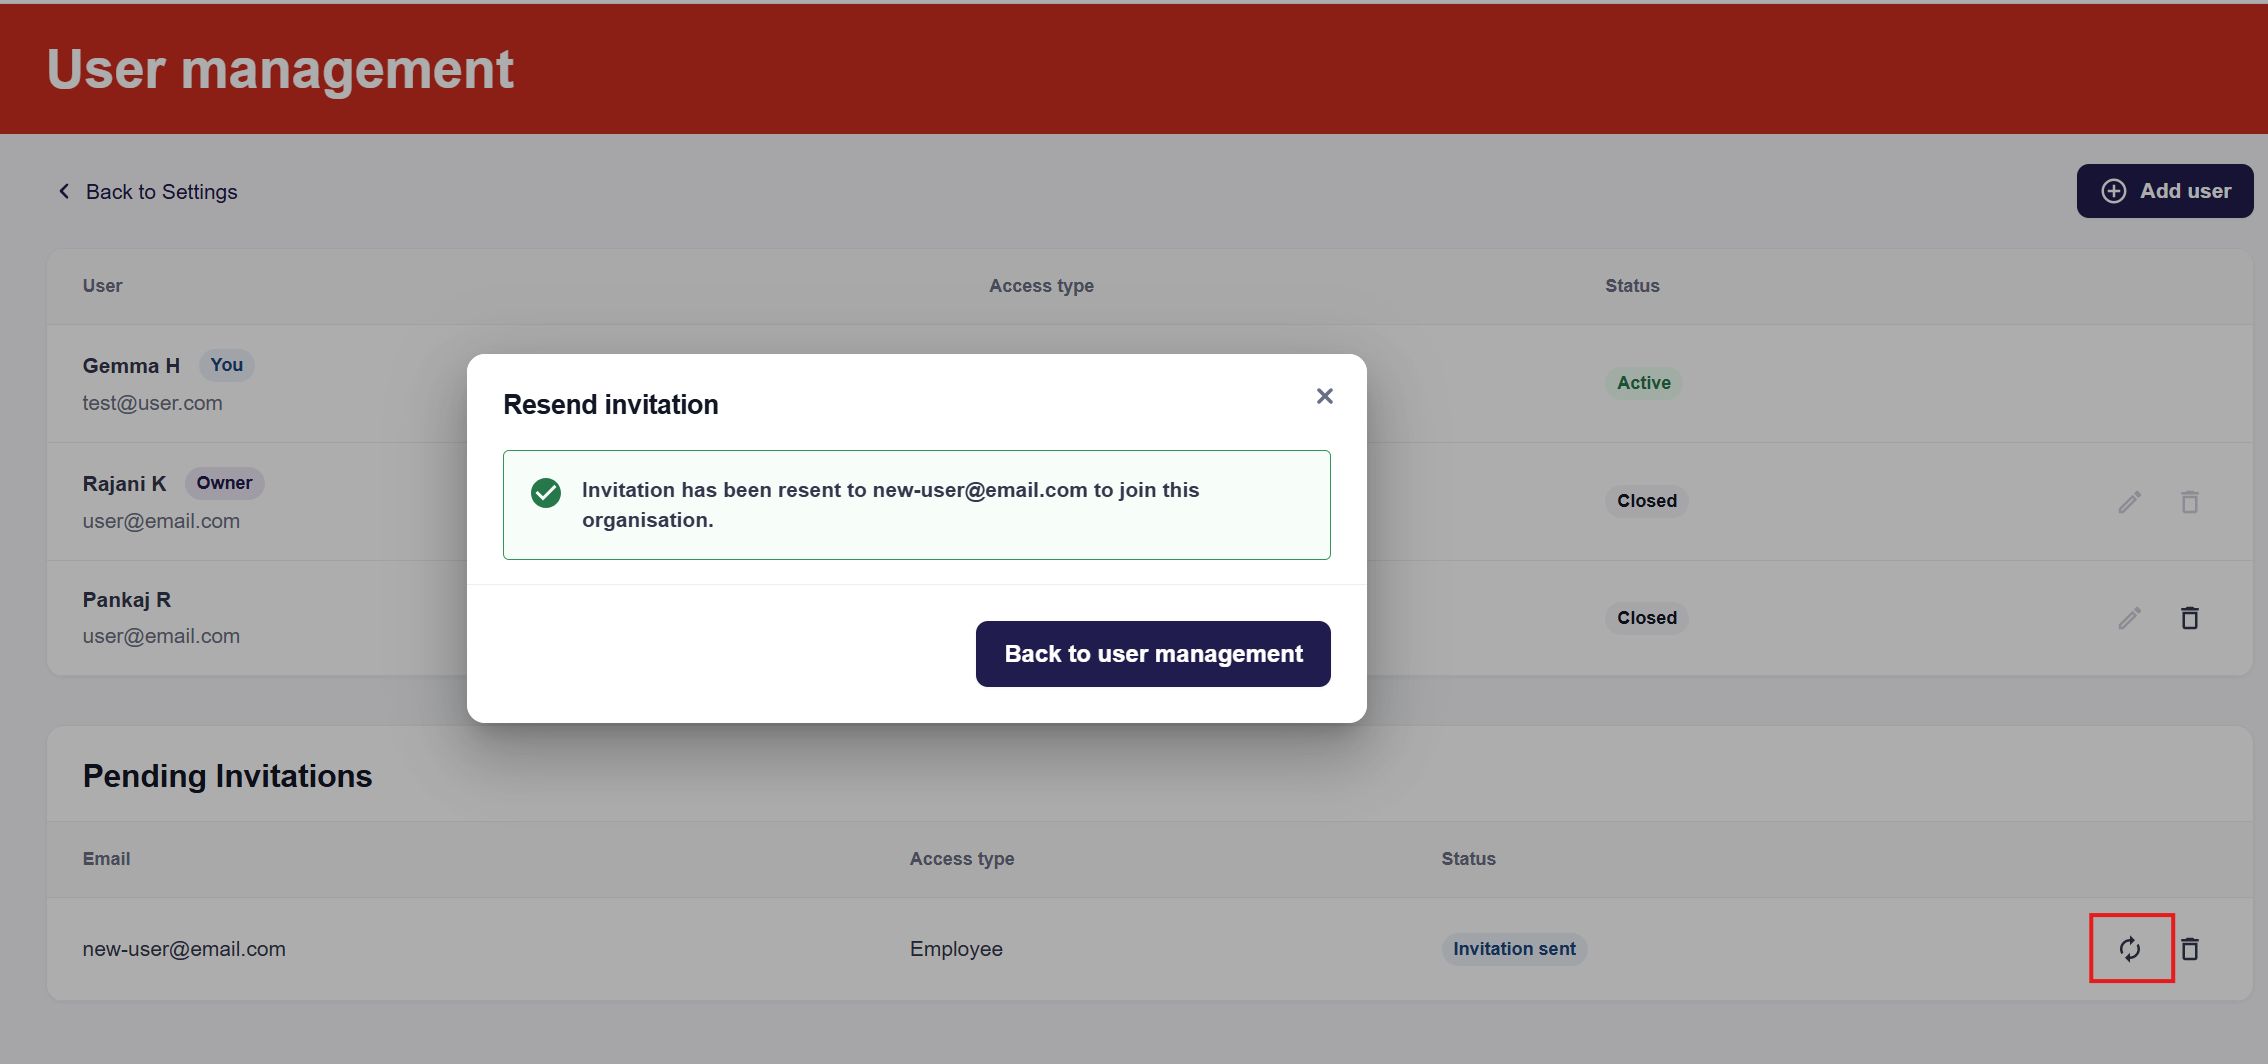
Update Details
You can modify a user's permissions at any time by clicking the edit icon ![]() next to their name in the user list. This allows you to change their role or adjust which merchant facilities they can access.
next to their name in the user list. This allows you to change their role or adjust which merchant facilities they can access.
- Open the User Management page from the sidebar.
- Click the edit icon
 next to the user you want to modify.
 - In the edit user form, you can change their role or adjust their merchant facility access.
- Tick the box to confirm that the email address is correct and acknowledge that the user will have access to sensitive financial data.
- Click Save to apply the changes.
- The following pop-up will appear prompting you to review the details you are about to update. Click Update to confirm the changes.
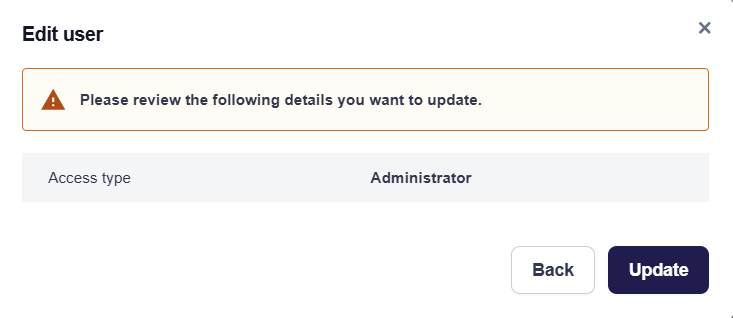
If the changes are incorrect, click Back to return to the edit form and make any necessary adjustments.
Roles and Permissions
Permissions are tiered to ensure security and data integrity. Use the table below to determine the correct role for your staff:
| Feature | Administrator | Employee | View Only |
|---|---|---|---|
| All Merchant Facilities & Terminals | Yes (Full Access) | Restricted/Selected | Restricted/Selected |
| User Management | Add, Edit, Delete | No Access | View Only |
| Business Settings | View & Edit | View Only | View Only |
| Transactions listing, settlements, reports and statements | View & Export | View Only | View Only |
| Action Capability | Perform all actions | Limited | No Edit/Submit rights |
Delete a user
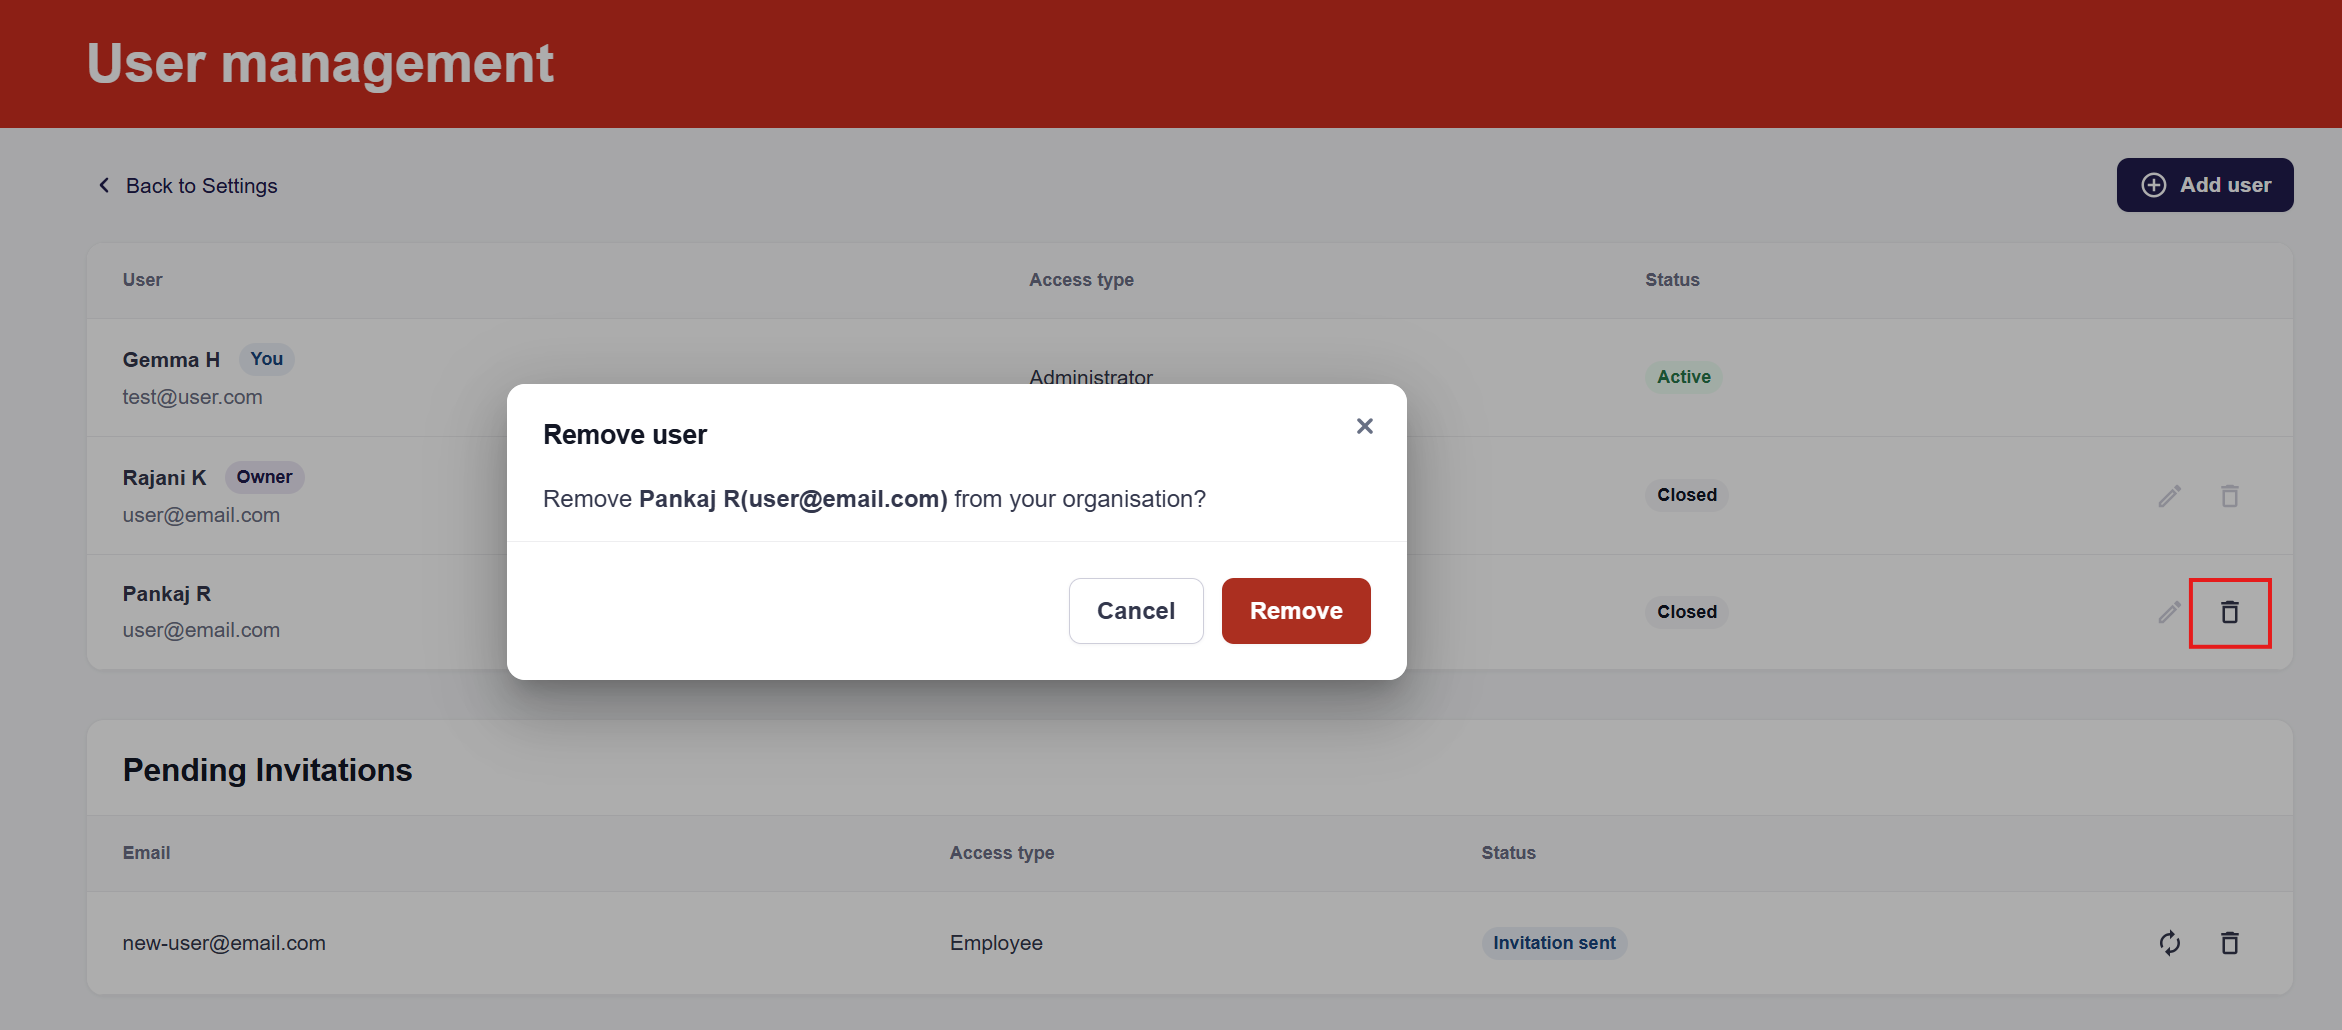
Administrators can manage the user list including removing users who no longer require access. To delete a user:
- Navigate to the User Management page.
- Find the user you want to remove and click the delete icon
 next to their name.
 - Confirm the deletion in the popup. This action will immediately revoke their access to the dashboard and all associated data.
Periodically review your user list. If an employee leaves the company, ensure their access is deleted immediately to keep your financial data secure.
Updated about 8 hours ago